Well, it's been almost a year now and my little experiment is just about done. I admit I'm a little disappointed in myself for not keeping up with the weekly posting as I had hoped. Still, I did learn a lot in ZBrush this year.
I have a much better understanding of the tools. I've experimented with a variety of work flows and building processes. I'm not very comfortable with incorporating ZBrush models in Maya, both with 32 bit displacement maps and normal maps.
I'm disappointed I had to drop out of ZBrush's "Create a Superhero" contest but I still learned a lot from watching the others develop and real-world work obviously takes priority.
This year also saw the release of a new ZBrush version which I'm sure will bring all new experiments and fun. But I'm afraid I won't have time to play around this year.
So I say "so long" with mixed feelings. Both encouraged by all that was learned, and yet disappointed I didn't do a better job overall. Maybe I'll be more organized and committed to 2010's project whatever that will be.
Sunday, December 27, 2009
Saturday, August 22, 2009
WakeUp Call - done
Rendering and Compositing of WakeUpCall
He's modeled, textured, detailed, posed and lit. I've now started the rendering for WakeUpCall. In this case the renders are broken up in to about a half dozen separate renders for things like the background, foreground, WakeUpCall himself and corresponding zDepth renders for depth-of-field and other effects to be assembled post-render.
Looking good so far I just hope my little computer can handle all the processing. I've had a couple of lockups already and I'm tweeking various rendering levels to compensate.
Looking good so far I just hope my little computer can handle all the processing. I've had a couple of lockups already and I'm tweeking various rendering levels to compensate.
Sunday, August 16, 2009
Overdue Update
Wow, no posts at all in July...I can't let that happen again. But not to worry, it's been my posting that's lacking...not my ZBrush usage.
I've learned a very helpful technique for quickly baking in some texture details from a tutorial video on the ZBrush site in the zClassroom. Here's a link to the classroom page: http://www.pixologic.com/zclassroom/homeroom/ and check out the MatCap to Texturemap video once you get there. It's simple and very straightforward. But you'll need to download the "image plane" plug-in from the plug-ins page before you can finish the tutorial.
ZBrush has also released a "natural media" painting plug-in for free. It looks interesting enough, but it doesn't look to replace Painter for those that use it and more than Alias Sketch would. Here's the link to the PaintStop page on the ZBrush site: http://www.pixologic.com/zbrush/features/PaintStop/. I plan on doing one or two pieces with the plug-in just as a test drive.
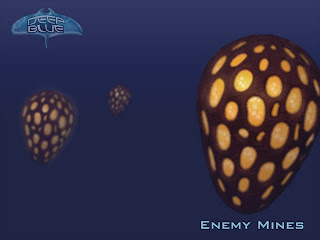
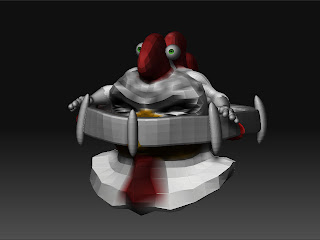
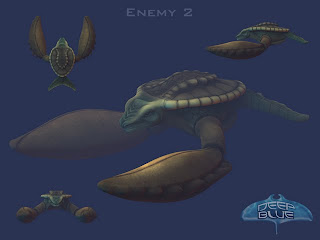
Now to current works. I've been working on an XNA game for the 360 and after all my attempts at vehicle/enemy design with traditional pencil and paper and other methods it was 3d sketching in zBrush that ended up putting me on the right track. Here are a few images of the models I've been working on.

Tuesday, June 2, 2009
Success!
Special thanks to goast666 on the ZBrush Central forums for helping out with the import workaround.
The Problem: ...was happening not on export from ZBrush or even import on ZBrush, but importing directly into an existing subtool level to update the UV's with UV's laid out in an external app (in this case Maya).
The Solution:
1. "Store" a "Morph Target" on the subtool layer before you import the new OBJ.
2. Import the OBJ. At this point the scale and position will be totally off.
3. Hit the "Switch" button in the morph target UI to snap the newly imported OBJ into the correct position and scale.
4. Then "Delete MT" (delete the morph target) for a quick clean up.
Worked like a charm and kept all the new UV's intact.
Thanks again goast.
Monday, June 1, 2009
More Problems...
 This lovely image is what's happening to my Zbrush tool when I simply export each subtool out to a OBJ then import them right back in to the same position in the tool. As you can see, the scaling and position of the subtools goes out the window on import.
The export looks sound since I can import the OBJs into Maya and everything looks super.
In fact, after just doing a simply test in Zbrush....importing the individual subtools into ZBrush and the assembling them back into one tool ends up with great results. But that doesn't get the details and the color back onto the newly imported subtools.
Still working on this one....but I'm running out of duct tape.
Sunday, May 31, 2009
Transpose Problems
Well, I had planned on using Wake Up call to experiment with the "Transpose Tool Master" plug-in. And, in a way, I guess I have. Enough at least to run into a number of crashes and other problems.
I'm not sure if it's the complexity of the model, or the relatively limited RAM in my machine but it seems it just can't handle the processing.
Soooooo, the fall back is to rig the base mesh in Maya, pose it and export the new base mesh back to ZBrush. As you could imagine it's gonna take a bit more time.
Subscribe to:
Comments (Atom)


